Put a Pin on It: DIY of the Week
A hand-crafted boutonniere & pinning tutorial
Between countless bouquets, aisle accent blooms and reception centerpieces, the number–and cost, of flowers for a wedding can be staggering. So why not save your florist a few tears and your wallet some singles and craft your own boutonnieres? A newbie to the task, I was unsure of the pesky pitfalls such a project might entail. But not to worry girls… it couldn't have been easier. And, after finishing the pretty product so quickly, I decided to throw in a tutorial for those who need guidance on pinning the boutonniere to a lapel. As one can imagine, most men are clueless in this department. So put your knowledge to good use on the day–or better yet, send this trusty how-to to your groom and his men. (Wife to-be of the year!).
The Materials.
So simple. I began with a large bouquet purchased at Trader Joe's. It included 4 orchids (which I would use one of in each boutonniere) and enough other blooms to use for probably about 10 boutonnieres. Then I got a small spool of burlap-esque ribbon and a packet of pins topped with pearls.

The Assembly.
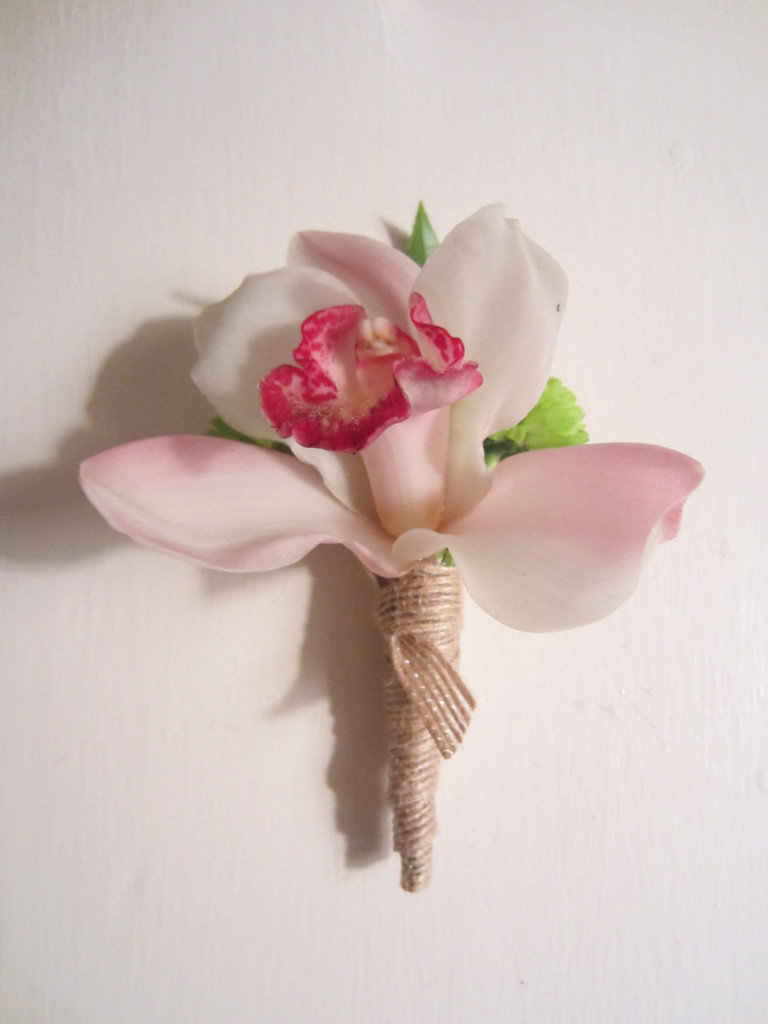
Gather your trimmed flowers and arrange them in a tight bunch the way you want them to look on the lapel. I used a large green leaf as a flat-lying back piece for the grouping. I began with the small pink flower within the bunch but decided against it for a more simple look. The orchids really speak for themselves and, should you choose to use them as well, they make a lovely focal point. Feel free to use a clear elastic to better hold the stems in place. The ribbon will easily cover it seamlessly.

Wrap It Up.
Cut a long piece of ribbon and hold the end in place on the back side. Begin wrapping tightly around the stems in an angular fashion. Work your way from the bottom back up to the top. Once you've reached the top/end of the ribbon strip, dab it with glue and press firmly.

Tying The Knot.
Now, cut another smaller piece and place the banded part of the boutonniere overtop in the spot you've just glued. Tie a tight knot and trim the ends. This adds a bit of interest and secures the ribbon so it won't unravel.

Et voila.
You're done. Place each boutonniere into a box and into the refrigerator until it's time for pinning on the big day.

Jacket Required.
This is easy enough to do with his jacket already on. For photo-taking purposes I used my own J. Crew peacoat and laid it out. First place the boutonniere in the desired position. Then lift the lapel with your free hand while holding the boutonniere in place.

Stick It.
Grab your pin and push it through the backside of the lapel in an upward diagonal motion into the banded stem of the boutonniere. Once your pin has punctured the boutonniere, angle the pin down and to the left. Now that you've brought the pin back through, it should look like this. Think of it as though you're making a sewing stitch.

Final Look.
From hand crafting a boutonniere to pinning it on like a pro, you've now done it all. And, I might add, in less than 10 minutes!