Tiny Garden: Microgreens
Delicious, easy-to-grow microgreens bring miniature gourmet to your garden
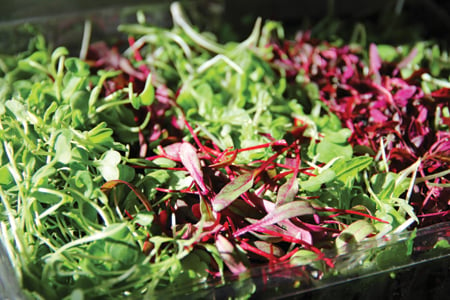
In the spring of 2010, Kate Brun knew she had to take action. As a real estate agent, she hadn’t had a closing in almost twelve months and her husband’s construction business was the slowest it had been in years. “Both of us were really struggling,” she says. So instead of sticking with real estate, Brun turned to a favorite pastime: gardening. “We’d heard about growing microgreens from a friend who lives in California and thought, ‘Let’s give it a shot,’” she says. Her new venture, Lucky Leaf Gardens, is housed in her backyard greenhouse at her home in Harrisburg. She specializes in microgreens—tiny vegetables and herbs that are harvested when they’re still juvenile (about five days after sprouting). “Microgreens have a much higher concentration of flavor and aromas [than their more mature counterparts]. They taste so fresh,” says Brun.
Brun’s first attempt was one batch of mixed microgreens, which she now refers to as “Lucky Mix”—a blend of broccoli, radish, kale, and cabbage. She sold that first harvest to The Brass Button Restaurant in downtown Concord. “It escalated from there, and soon we were selling our microgreens to restaurants from Ballantyne to Davidson and everything in between.”
Now, two years later, Lucky Leaf Gardens’ microgreens are on plates at hot spots such as Halcyon, Pewter Rose, Flatiron Kitchen + Taphouse, Enzo Sushi, Harvest Moon Grille, and dozens more. And the options have expanded from the flagship Lucky Mix to forty other veggies, herbs, and even edible flowers. We sought out Brun’s expertise on why microgreens are the perfect garden for a novice and why so many nutritionists advocate eating them.
What’s the best way to grow microgreens?
Brun suggests purchasing organic seeds at a local store such as The Bradford Store in Huntersville. Fill a small container with holes in the bottom (for drainage) with organic compost or organic feed starting soil. Plant your seeds, spritz with water, and then place on a sunny windowsill. There are no exact requirements for how much sun per day microgreens need, adds Brun. “After five days of growth, you can harvest them,” she says. “It’s that easy.”
What if I want to grow them outside?
“No problem,” says Brun. Find a container with holes in the bottom—microgreens don’t like wet feet—and plant the seeds. Microgreens can’t tolerate frost or heavy sun, so bring them inside if the temperature dips and place them in indirect sunlight during the summer months.

What about pesticides if the microgreens are grown outside?
“There’s no need to fertilize or spray with pesticides because the plants grow for such a short period of time,” says Brun. “There’s not enough time for insects or bugs to attack. It’s a foolproof garden.”
What microgreens are best for beginners to grow?
The Lucky Mix. It’s a combination of radish, broccoli, cabbage, and kale. “Plant all four and mix them up in a batch. They’re easy to germinate, harvest, and grow,” says Brun. “Plus, they have a great shelf life.”
Can I cook or steam my microgreens?
Brun doesn’t suggest it. “There’s no need,” she says. “Put them on top of cooked salmon, throw them in omelets, put them in wraps, or toss them with a very light vinaigrette.”
I don’t want to grow my own microgreens. Where can I buy yours?
Lucky Leaf Gardens will grow a batch of whatever microgreens you want—in fact, “we only harvest what’s ordered so there’s never anything sitting around waiting to be sold,” says Brun. You can pick up your order at Atherton Market or at any Piedmont Farmers Market for $3 per ounce.